
Using CDN in a WordPress blog is important same as secure your computer with Antivirus.Wordpress is very famous CMS but still having some faults related to security.Some bad programmers always looking for a blog which they can easily crack and can steal.
WordPress password security is not easy to break, but programmers can crack the password which you use to login into your password.There are many ways to steal a WordPress blog, but Cloud flare content delivery network can secure your blog.
What is CloudFlare CDN?
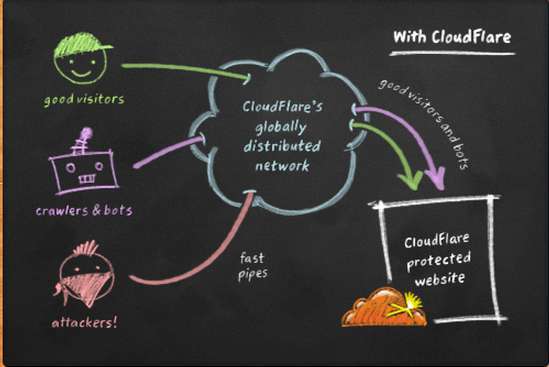
Cloud Flare is a content delivery network, the content delivery network may be friendly with you because most of the WordPress users installs Jetpack and other CDN plugins, but the best one is Cloud Flare CDN.Cloud Flare secure WordPress blog from attackers.
Cloud Flare also speeds up your blog by delivering content on the behalf of your hosting provider which result to make blog loading fast and also secure blog from attackers at the same time.Clout flare doesn’t only focus on delivering the content like other CDN services like Jetpack but also refine the visitors from attackers, real Visitors, nd bots.
 How to Setup CloudFlare
For beginners, we’re going to tell you that how users can easily setup CloudFlare CDN on their WordPress blog.
Step 1.Visit the CloudFlare Official site here.(CloudFlare)
Step 2.Create an account on Cloud Flare.
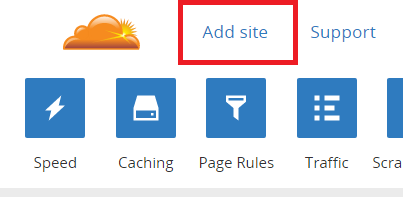
Step 3.After creating an account, add a new site to CloudFlare account.
 Step 4.After the adding site to CloudFlare, It will start a scanning of your website to find server Name and DNS records.
Step 5.Next step is to Select plan, CloudFlare has options to select a Free plan, Pro plan, and Business plan.
Step 6.Now CloudFlare tells you to remove old server names and to add a new server name which CloudFlare provided you.
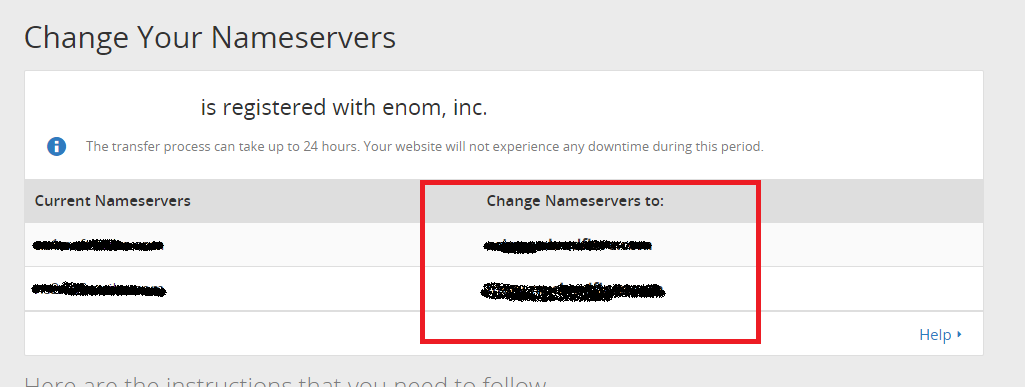
Learn How to Change Name Server in Godaddy, Bigrock, Hostgator or on any other Hosting provider.
Now wait for 24 hours, It will take 24 hours to get update new server name.After 24 hours, your blog will become secure with CloudFlare CDN but before you have to customize setting from CND plugin which you installed on WordPress blog.
Customize CloudFlare CDN WordPress Plugin
CloudFlare works very effectively, but before activate CloudFlare on your WordPress blog, you have to customize setting of the CloudFlare WordPress plugin.
Step 1.Download CloudFlare WordPress plugin here.
Step 2.Install and activate this plugin.
Step 3.Click on the setting option of CloudFlare plugin.
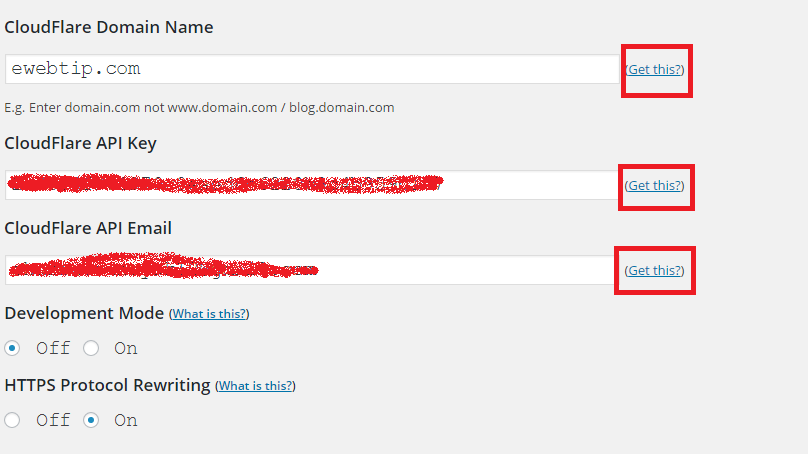
Step 4.After following these steps you’ll see three text boxes.
- First for CloudFlare Domain Name.
- Second for CloudFlare API key
- Third for CloudFlare API Email
Step 5.You have to enter all the information of your CloudFlare account which you’ll get easily by clicking on the option of ‘Get This?’
 After updating these options, your blog will get CloudFlare activated after 24 hours automatically.
Final Words
If you had successfully setup CloudFlare on your WordPress blog, then share this information with others on social networking sites and also subscribe us to get more directly in your Email inbox.
Wonderful post however I was wondering if you could write a litte more on this topic?
I’d be very thankful if you could elaborate a little bit further.
Thanks!
fatima recently posted…PhoneClean Pro Crack, License Key Free Download
amazing post, really this is very informative for me so keep it up…
aisha recently posted…CPUID HWMonitor Pro Crack 1.20 (FULL + Keygen) Download
Hi there, of course this article is actually nice and I
have learned lot of things from it about blogging.
thanks.
aisha recently posted…Wondershare Data Recovery 4.7.0.5 Crack + Serial Key Download
Cloudflare is really good cnd service provider and reliable name in the industry, your guide for setting up free account worth using it. At this time i am using MAX cdn on my blog but looking for free solution and now here i found it. Thanks a lot.
Avnish recently posted…Maxcdn vs cloudflare – which is best CDN service provider ?