 Today we’re going to share, how to setup mail Chimp on a WordPress blog.Mail chimp is one of the best tools to host an E-mail subscription service on a blog.There are three Email subscription services are cover the most of the part on Internet Mail chimp, Aweber, and Feed Burner.
Mail chimp offers two type of version free and premium, in free version mail chimp Send 12,000 emails to 2,000 and for premium version click here.
Steps to Use mail chimp on a WordPress Blog
Step 1.Create a free account on Mailchimp.
Step 2.Open you home page of mail chimp.
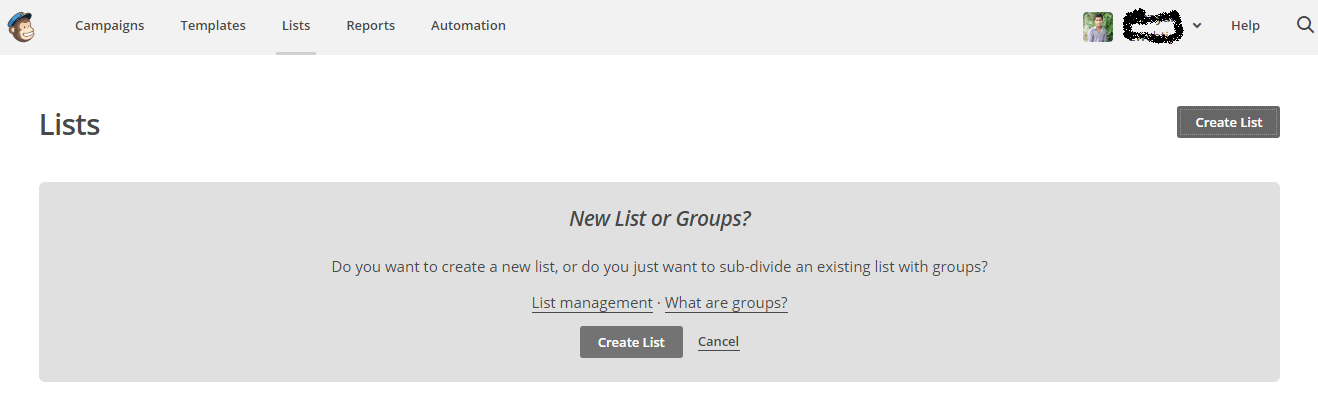
Step 3.Create a new list by clicking the Lists option is the top menu bar.
Step 4.Now click on the new list.
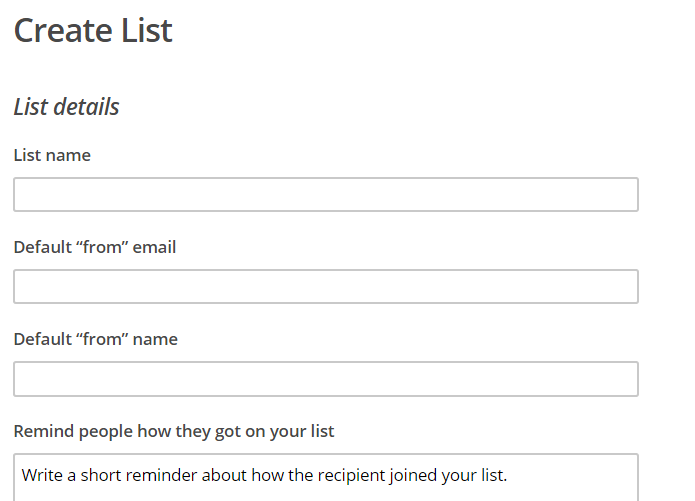
Step 5.Enter the details to create a new list.
Step 6.Now Download Official WordPress Mailchimp plugin.
Step 7.Install and activate this plugin.
Step 8.Integrate WordPress site with MailChimp by connecting your WordPress site with MailChimp.
Step 9.Now customize your settings from your MailChimp WordPress plugin dashboard.
Step 10.Open widget option in your WordPress.
Step 11.Add MailChimp widget where you want.
Customize You MailChimp subscribe us Box.
MailChimp provides an elegant Widget box to their users but to get more attention of readers of your blog, you need to create a stylish and bright Subscribe us box.See, I customize MailChimp Sign up box for my blog.
To make your widget look like this click here to download Plugin.
Learn How to Use Wp subscribe plugin
Step 1.Download Wp Subscribe plugin.
Step 2.Click on the widget option.
Step 3.Add Wp subscribe widget to the sidebar.
Step 4.Select the service MailChimp in Wp subscribe widget.
Step 4.Enter API key and your MailChimp List ID.
Step 5.Find Here API key and MailChimp ID.
nice information it look great to me…..Thx
Healthnic recently posted…Top 10 Health Benefits of Almonds